


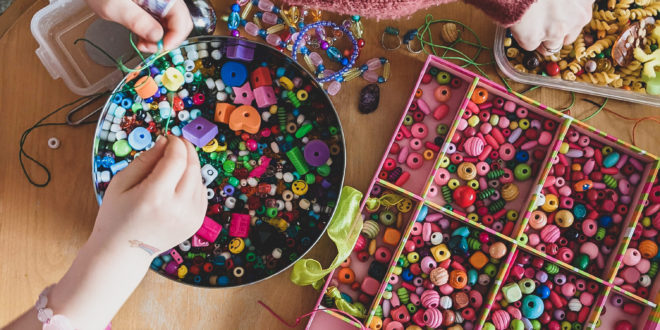
If you find yourself on baby sitting duty during the school holidays, you will no doubt be looking for some ideas to keep the Grandies occupied. How about creating a beaded animal together? It’s sure to keep everyone amused for hours and keeps the creative juices flowing!
First, you’ll need:
• beads
• wire (or nylon fishing line)
• pattern (try googling ‘free beaded animal pattern’)
What do you use – wire or nylon fishing line? Normally I use fishing line because I found it easier to use and its ends won’t kink. However, it has no definite shape and the animal won’t stand on its feet. The wired animals will stand and you can bend them as you like. So, I would suggest the wire, but very thin wire.
Important
If you’re making an animal that has to be round, 3D or plump (like a penguin), always use nylon fishing line, because the wire will be almost completely flat.
What about beads?
I’ve been using seed (small) beads for the body of the animals since I started beading. There are also long beads you can use for wings and sometimes legs.
Seed Beads:
These are the basic beads used for beading, they usually make up the body of an animal. You can buy them in whatever colour, size and shape you want. I use quiet small and round seed beads.
Bigger Beads:
These are much bigger than the seed beads. I usually use them for the eyes of an animal. However, use them whenever you want to highlight something.
Long Beads:
The size of the long beads is between the seed beads and the ‘bigger beads’. I use them for wings, legs and sometimes for some other parts of the animal’s body.
Basic Beading Techniques.
Back and Forth
Use this instruction to make the body of the bead animals. After you’ve finished with the first row, make the second row by doing the same thing again. In this way, make the rest of the animal.
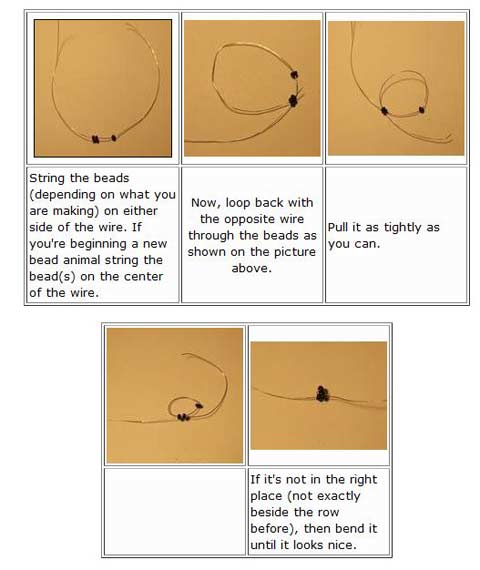
Important:
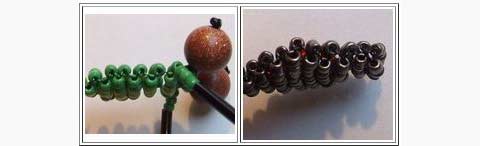
If you are making an animal that should be flat, then push the rows beside each other (and use wire). However, if your animal is supposed to be round (3D), pull each row very tightly to make them overlap.
If this doesn’t help, then simply put the rows right opposite each other. After that, if you look at your animal from the side, then the rows should look zigzagged, as shown on the picture below.
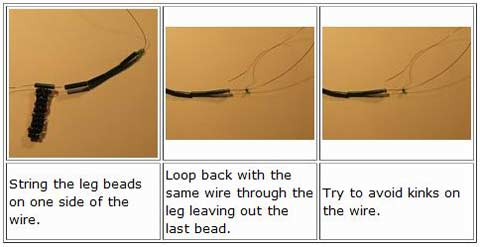
Leg Making
There are many ways to make a leg for animals:
1. Simple straight leg
2. Leg with foot
3. Leg with foot and toes
A general tip when you’re making a leg: hold the leg as near as you can to the body when you pull it tightly.
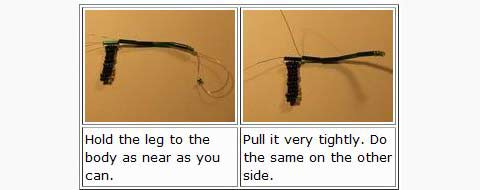
Leg with foot
Here you have the leg with foot. This is as uncomplicated as the simple leg.
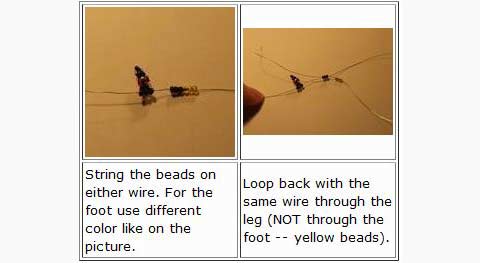
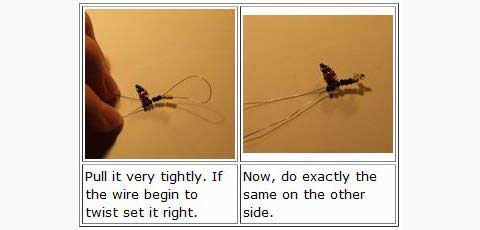
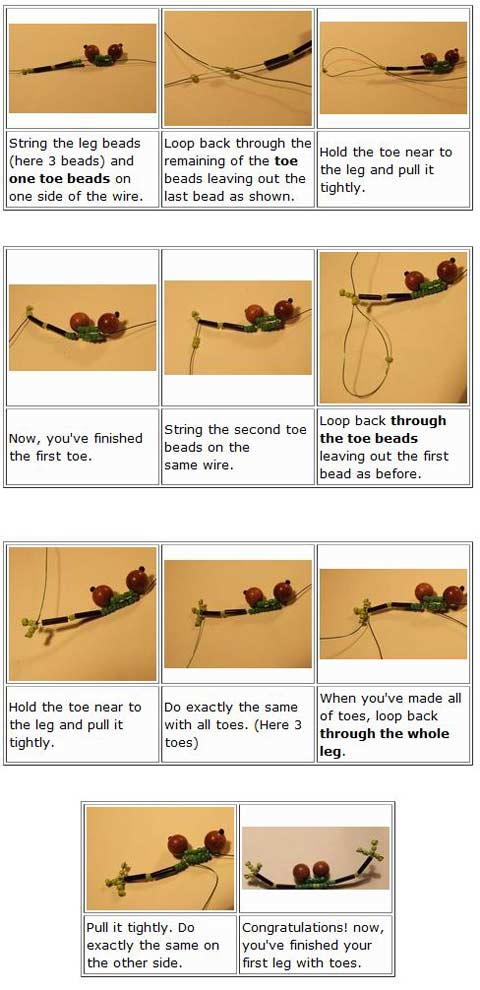
Legs with feet and toes
The technique used to make this type of leg is a bit more complicated than the others. However, after you understood and made it once or twice, it’ll become a routine job.
You’ll make this leg a bit differently than the other two. The main difference is that you don’t string each ‘leg-bead’ on the wire straight away. First, you string the leg-beads and one toe beads.
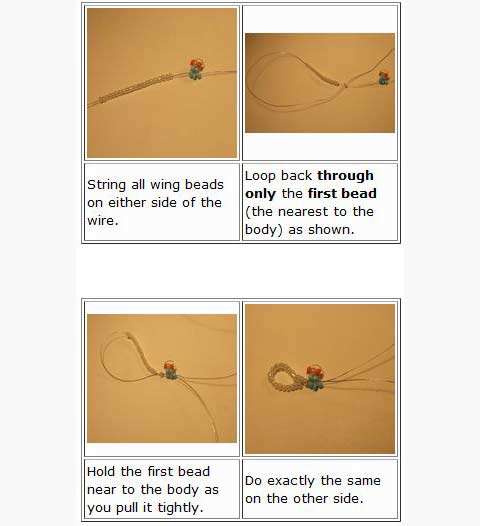
Wing making
This is as plain as the simple straight leg.
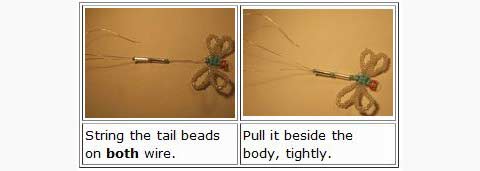
Tail making
Use this technique to make the tail of an animal or the abdomen of an insect.
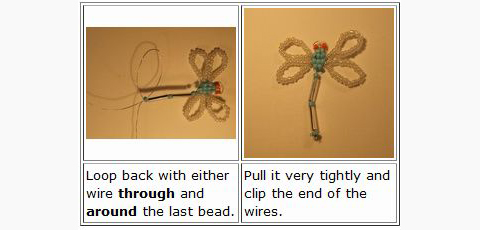
Finishing:
Now you need to make a knot on the end of the tail, otherwise the beads will fall off.
Join the Discussion
Type out your comment here:
You must be logged in to post a comment.